> ## Documentation Index
> Fetch the complete documentation index at: https://docs.makemypass.com/llms.txt
> Use this file to discover all available pages before exploring further.
# Event Management
> The event page has four main sections for managing your event: public presence, appearance, attendee actions, and communication.
 ### Public URL
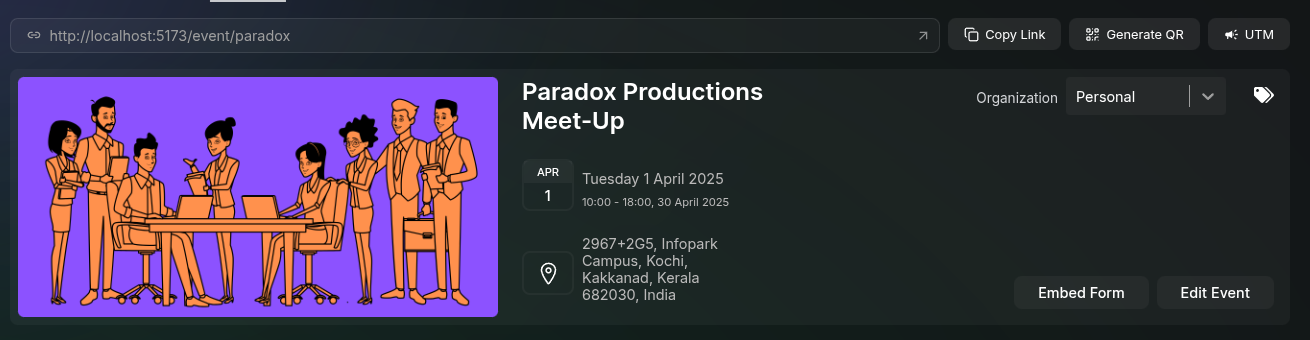
Your event has a public URL in the format `makemypass.com/event/eventTitle`. This URL is what you'll share with potential attendees.
you can:
* **Copy Link**: Quickly copy the public URL to your clipboard
* **Generate QR**: Open a modal with a QR code for your event's public link, which can also be downloaded
### UTM Parameters
UTM parameters help you track the effectiveness of your marketing campaigns.
### Public URL
Your event has a public URL in the format `makemypass.com/event/eventTitle`. This URL is what you'll share with potential attendees.
you can:
* **Copy Link**: Quickly copy the public URL to your clipboard
* **Generate QR**: Open a modal with a QR code for your event's public link, which can also be downloaded
### UTM Parameters
UTM parameters help you track the effectiveness of your marketing campaigns.
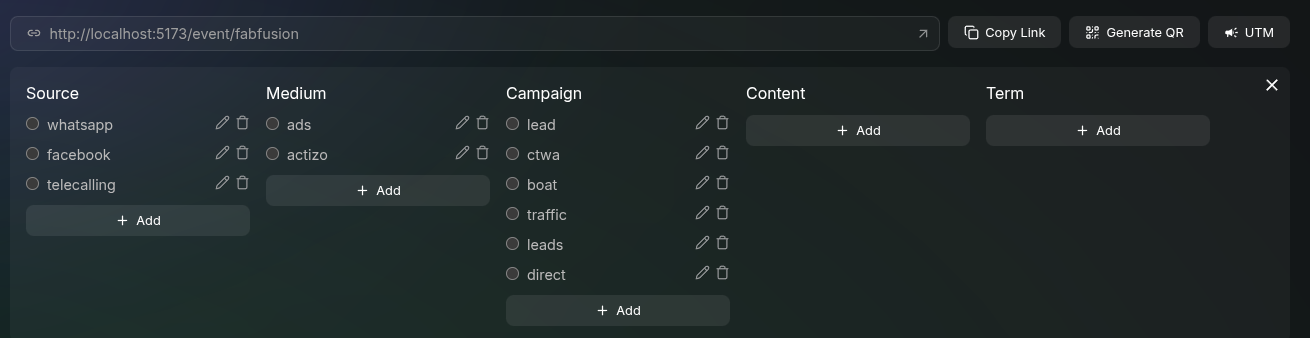 To add UTM parameters:
1. Click the "UTM" button to open the UTM section
2. Add tags under any of the five categories:
* Source
* Medium
* Campaign
* Content
* Term
3. Check the checkbox next to each tag you want to append to the URL
4. Copy the updated URL with the UTM parameters to share
## Organization Management
To change the event's organization:
1. Click the organization dropdown
2. Select from the organizations you have access to
3. Click the save icon that appears after making your selection
## Event Tags
Tags help you organize and group events for easier management.
To add UTM parameters:
1. Click the "UTM" button to open the UTM section
2. Add tags under any of the five categories:
* Source
* Medium
* Campaign
* Content
* Term
3. Check the checkbox next to each tag you want to append to the URL
4. Copy the updated URL with the UTM parameters to share
## Organization Management
To change the event's organization:
1. Click the organization dropdown
2. Select from the organizations you have access to
3. Click the save icon that appears after making your selection
## Event Tags
Tags help you organize and group events for easier management.
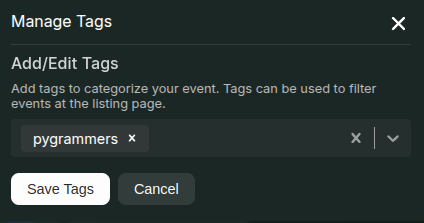 To add tags to your event:
1. Click on the **Tags icon** in the top right of the banner section
2. In the modal that appears, create new tags or select existing ones
3. Click the "Save Tags" button
## Additional Actions
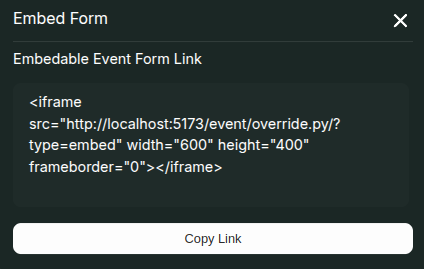
* **Embed Form**: Click this button to get an iframe code you can paste into your website to embed the registration form
To add tags to your event:
1. Click on the **Tags icon** in the top right of the banner section
2. In the modal that appears, create new tags or select existing ones
3. Click the "Save Tags" button
## Additional Actions
* **Embed Form**: Click this button to get an iframe code you can paste into your website to embed the registration form
 * **Edit Event**: Click to access the full event settings
## Mail Management
This section allows you to configure and customize the email communications sent to attendees at different stages of the event.
### Available Email Templates
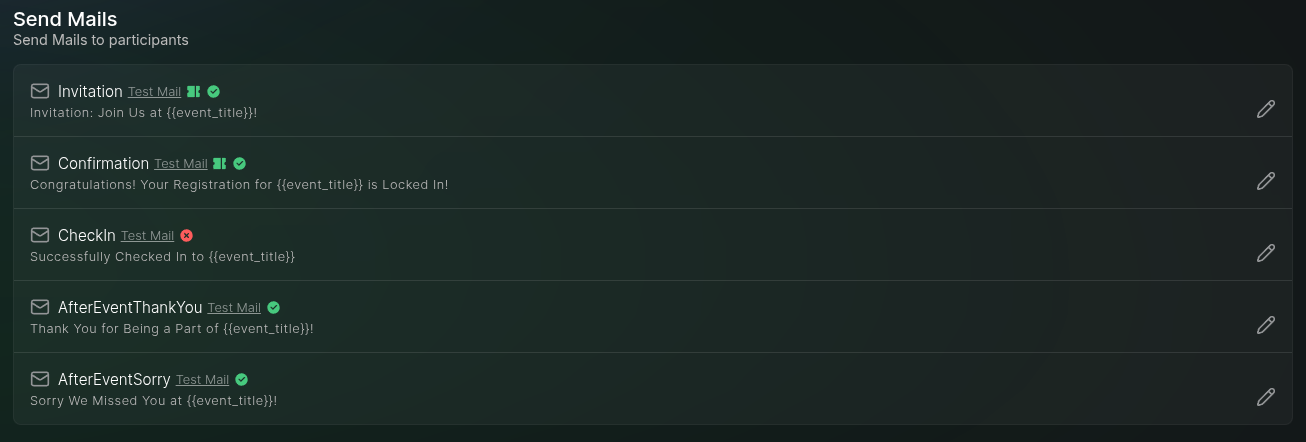
MakeMyPass supports five different types of emails:
1. **Invitation Email**: Sent when a user is directly invited by the organizer from the guest page
2. **Confirmation Email**: Sent when a user is confirmed for the event (immediately after registration if there's no waitlisting, or after being shortlisted by an admin)
3. **Check-in Email**: Sent to users when they check in at the event venue
4. **After Event Thank You**: Sent to attendees who checked in at the event (triggered by admin from the post-event page)
5. **After Event Sorry**: Sent to registrants who did not check in at the event
* **Edit Event**: Click to access the full event settings
## Mail Management
This section allows you to configure and customize the email communications sent to attendees at different stages of the event.
### Available Email Templates
MakeMyPass supports five different types of emails:
1. **Invitation Email**: Sent when a user is directly invited by the organizer from the guest page
2. **Confirmation Email**: Sent when a user is confirmed for the event (immediately after registration if there's no waitlisting, or after being shortlisted by an admin)
3. **Check-in Email**: Sent to users when they check in at the event venue
4. **After Event Thank You**: Sent to attendees who checked in at the event (triggered by admin from the post-event page)
5. **After Event Sorry**: Sent to registrants who did not check in at the event
 | Icon | Meaning |
| --------------------------------------------------------- | ------------------------------------------------------ |
| | Ticket for the guest will be send with this mail |
| | This mail is active, will be send at the trigger point |
| | This mail is in-active and will not be send. |
### Editing Email Templates
To customize any email template:
1. Click the edit button next to the specific email type
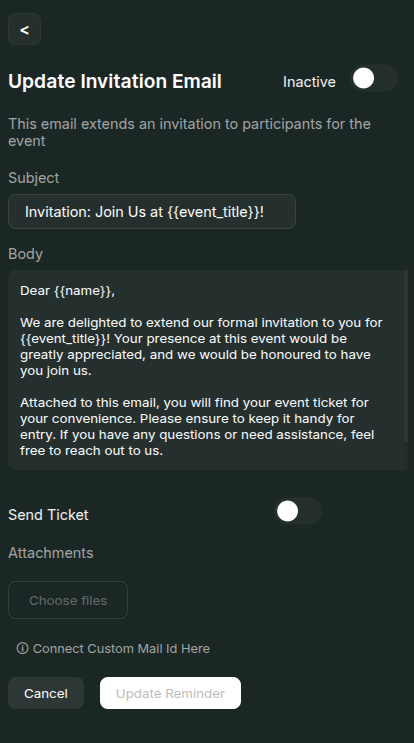
2. In the modal that opens, you can:
* Edit the email subject and body
* Add form fields within double curly braces `{{}}` which will be dynamically populated
* Choose whether to include the ticket with the email
* Add attachments to the email
* Configure a custom SMTP server for sending the email
3. Use the toggle button to activate or deactivate the email type for this event
| Icon | Meaning |
| --------------------------------------------------------- | ------------------------------------------------------ |
| | Ticket for the guest will be send with this mail |
| | This mail is active, will be send at the trigger point |
| | This mail is in-active and will not be send. |
### Editing Email Templates
To customize any email template:
1. Click the edit button next to the specific email type
2. In the modal that opens, you can:
* Edit the email subject and body
* Add form fields within double curly braces `{{}}` which will be dynamically populated
* Choose whether to include the ticket with the email
* Add attachments to the email
* Configure a custom SMTP server for sending the email
3. Use the toggle button to activate or deactivate the email type for this event